Can You Replace Office Chair Gas Cylinder?
Yes, you absolutely can replace an office chair gas cylinder, and it’s often a more economical solution than buying a whole new chair. Many office chairs are designed for this specific repair.
You don’t need to ditch your favorite desk chair just because it won’t stay up anymore. Replacing the gas lift cylinder can give it a new lease on life and restore its proper functionality.
- You can replace your chair’s gas cylinder.
- It saves money over buying a new chair.
- Most chairs are built for this repair.
- It restores your chair’s height adjustment.
Ready to get your chair lifting like new again? Let’s walk through everything you need to know about replacing your office chair gas cylinder, step by step.
Understanding Your Office Chair’s Lifting Mechanism
Before you dive into replacing your office chair gas cylinder, it’s helpful to understand a bit about how this crucial component works. Your chair uses a gas lift to adjust height. This gas lift, or gas spring as it’s sometimes called, is essentially a sealed cylinder filled with pressurized nitrogen gas. It has a piston that moves up and down inside the cylinder.
When you activate the lever, a valve opens, allowing the gas to compress or expand, which then moves the piston and changes your chair’s height. This mechanism is what gives your chair that smooth, effortless up-and-down motion. When it fails, the gas escapes, and your chair starts sinking, or worse, won’t stay at any height at all.
Symptoms of a Failing Gas Cylinder
How do you know it’s time for a replacement? The signs are usually quite clear. The most common symptom is your chair slowly sinking throughout the day. You might raise it, only for it to be back down an hour later. It’s like your chair has a mind of its own, but not in a good way.
Another sign is that the chair won’t hold its height at all when you sit in it. You adjust it, and as soon as you put your weight on it, it drops to the lowest setting. Sometimes, the chair might even become wobbly, indicating the seal within the cylinder is compromised or the cylinder itself is damaged. These are all good indicators that a new gas lift is in your near future.
Identifying the Correct Replacement Gas Cylinder
Finding the right replacement gas cylinder might seem tricky at first, but it’s usually quite straightforward. Most office chair gas lifts are standardized. This means there isn’t a huge variety of sizes or types, which simplifies your search quite a bit. You’re looking for one that fits your chair's base and seat mechanism.
The key dimensions to focus on are the cylinder’s diameter and its stroke length. The stroke length refers to how much vertical travel the cylinder provides. Don’t worry, you don’t need to be an engineer to figure this out. Most gas lifts have standard measurements.
Measuring Your Current Gas Lift for a Match
To get the right fit, you’ll need to do a little measuring. First, measure the visible metal shaft and the outer casing of your current cylinder. You want to focus on two main parts: the diameter of the cylinder where it goes into the chair base, and the diameter of the smaller rod that inserts into the seat mechanism.
- Most chair bases are designed for a 2-inch diameter cylinder at the bottom.
- The top part, which goes into the seat mechanism, is typically 1.1 inches.
Next, consider the stroke. This is the difference between the full extended height and the fully compressed height. You can estimate this by looking at how much the cylinder extends when your chair is at its highest point versus its lowest point. Many replacement cylinders list their stroke range directly.
Gathering Your Tools and Preparing for the Swap
Before you begin the replacement process, it’s a good idea to have all your tools ready. This will make the job much smoother and prevent frustrating pauses. You won’t need a whole workshop, but a few common household tools will be very helpful. Think of it like cooking: you gather all your ingredients first.
Essential Tools Checklist
Here’s a quick list of what you’ll likely need. Most of these can be found in any basic toolkit:
- Rubber Mallet (or a regular hammer with a block of wood)
- Pipe Wrench (or Channel Lock Pliers)
- Gloves (for grip and protection)
- Pry Bar or Flathead Screwdriver
- Lubricating Spray (like WD-40)
- Safety Glasses (always a good idea!)
Having these items on hand will save you time and effort. The lubricating spray is especially useful for loosening stubborn parts that might have been stuck together for years. Safety glasses are for protecting your eyes from any unexpected debris or sprays.
Step-by-Step Gas Cylinder Replacement Guide
Now for the main event! Replacing the gas cylinder is a series of relatively simple steps. You’re essentially taking the chair apart in a specific way and then putting it back together with the new component. It’s less complicated than it sounds and very rewarding once completed.
Remember to take your time and be patient. Some parts might be a bit stubborn. Your chair has probably been together for a while, so expect some resistance. Think of it like a puzzle — you’re just carefully dismantling and reassembling it.
Disassembling Your Chair
The first step is to get the chair ready for surgery. It’s usually easiest to work with the chair upside down or on its side. Many people find placing it on a sturdy table makes the job easier on your back.
Removing the Chair Base
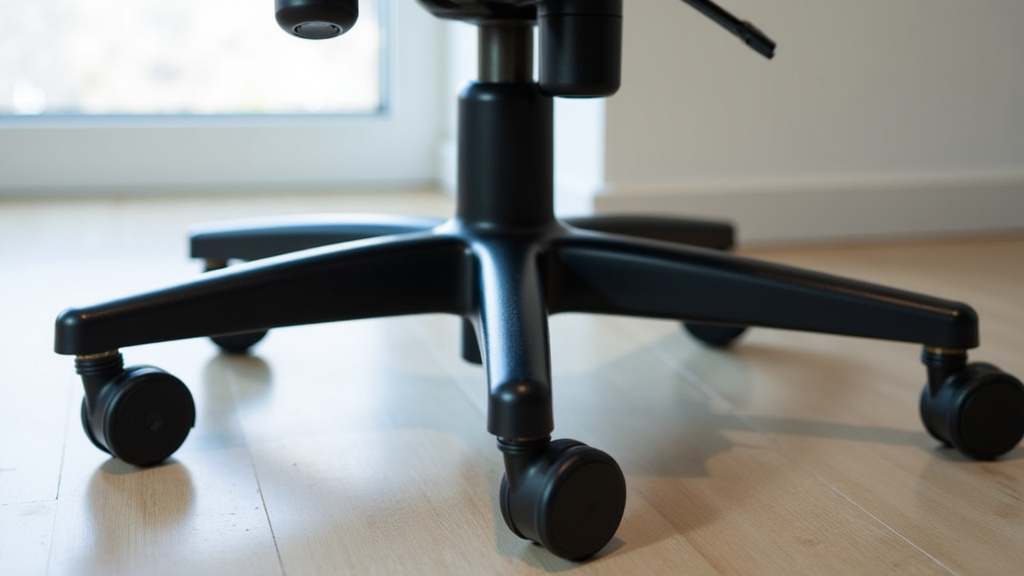
First, detach the chair’s base. Turn your chair upside down. You’ll see the large five-star base connected to the gas cylinder. Often, the cylinder is just pressure-fitted into the base. Use your rubber mallet to gently, but firmly, tap around the cylinder where it meets the base. You might have to tap several times from different angles. The goal is to loosen the connection without damaging the base. Eventually, the base should separate from the cylinder.
Separating the Seat Mechanism from the Cylinder
Next, you need to remove the gas cylinder from the seat mechanism, which is the metal plate directly under your seat cushion. This part can be more challenging because the cylinder is often very tightly seated. It might feel like it’s welded in there, but it’s just a very snug fit.
Lay the seat part on its side. Spray some lubricating oil around the top of the cylinder where it enters the seat mechanism. Let it soak for a few minutes. Then, using your pipe wrench or large Channel Lock pliers, grip the top of the cylinder firmly and twist. You might also need to use your mallet to tap the sides of the cylinder while twisting. Keep working at it, and it will eventually come loose. Once separated, you can discard the old, faulty cylinder.
Installing the New Gas Cylinder
With the old cylinder out, installing the new one is much easier. It’s essentially the reverse of the removal process. The new cylinder should slide into place with relative ease because it hasn’t been subjected to years of pressure and wear.
Attaching the New Cylinder to the Seat Mechanism
Take your new gas cylinder and insert its tapered top end into the hole in the seat mechanism. Gravity and the weight of the chair will help secure it. A gentle push or two should be enough to seat it firmly. You don’t need to hammer it in; pressure will create a strong seal once you sit on the chair.
Reattaching the Chair Base
Finally, carefully place the chair base (the five-star leg assembly) onto the bottom of the new gas cylinder. Make sure it’s centered and aligned properly. Again, simply pushing it down will usually create a secure fit. Once everything is assembled, flip your chair right side up.
Testing Your Newly Repaired Chair
Once everything is back together, it’s time for the moment of truth! Sit on your chair and test the height adjustment. Does it move up and down smoothly? Does it hold its height when you stand up and sit back down? If so, congratulations — you’ve successfully replaced your office chair gas cylinder!
You should feel a noticeable difference. The chair will likely feel more stable, and the height adjustment will be crisp and reliable, just like when it was new. It’s a great example of how a relatively small repair can make a huge difference in the usability and comfort of your furniture. Enjoy your fully functional chair again!
When to Consider a New Chair vs. Replacing the Cylinder
While replacing a gas cylinder is often the best solution, there are times when it makes more sense to buy a new chair. How do you decide? It primarily comes down to the overall condition of your current chair versus the cost and effort of the repair.
| Factor | Consider Replacing Cylinder |
Consider New Chair |
|---|---|---|
| Cost | Cylinder replacement typically costs $20-$50. | New chairs can range hundreds to thousands of dollars. |
| Chair Condition | Otherwise good condition: sturdy frame, good upholstery, no major damage. | Worn-out, wobbly frame, torn upholstery, broken armrests, or other significant issues. |
| Time/Effort | 15-30 minutes for the repair. | Shopping for a new chair can take hours, plus assembly time. |
| Sentimental Value | You love your chair and want to keep it. | No particular attachment, or looking for an upgrade. |
If your chair’s frame is cracked, the wheels are constantly falling off, or the padding is completely gone, a new gas cylinder won’t fix those issues. In those cases, the cost of a cylinder might be better put toward a new, more comfortable, and supportive office chair (Consumer Reports).
Conclusion
You’ve seen that replacing an office chair gas cylinder is a doable and smart repair. It not only saves you money but also breathes new life into a sinking chair. By understanding the mechanism and having the right tools, you can avoid buying a whole new unit.
Now that you know how straightforward it is, don’t let a failing gas cylinder diminish your comfort or productivity. Take action and restore your chair to its full, functional glory!
Frequently Asked Questions
How long do office chair gas cylinders typically last?
The lifespan of a gas cylinder varies greatly depending on usage, chair quality, and user weight. On average, you can expect a cylinder to last anywhere from 3 to 10 years before it starts to show signs of wear or failure.
Can a broken gas cylinder be dangerous?
While usually not dangerous, a failing gas cylinder can cause your chair to suddenly drop, potentially leading to a jarring experience. If the inner seals are completely compromised, the chair might become wobbly, reducing stability and comfort.
Are all office chair gas cylinders the same size?
While most gas cylinders are standardized for diameter where they connect to the base and seat, their overall length and stroke range can differ. It’s important to measure your existing cylinder to ensure you get a replacement with a similar height adjustment range.
Can I just add air to a failing gas cylinder?
No, office chair gas cylinders are sealed units filled with pressurized nitrogen. They are not designed to be refilled or re-pressurized once the gas seal has failed. Attempting to do so could be unsafe and risks further damage.
What if my gas cylinder is stuck and won’t come out?
Stuck gas cylinders are common due to years of pressure and friction. Apply lubricating spray generously and let it soak. Using a rubber mallet and pipe wrench with steady, firm pressure, coupled with rotating motions, will usually free it. Patience is key for stubborn cylinders.