
How to Condition a Leather Office Chair?
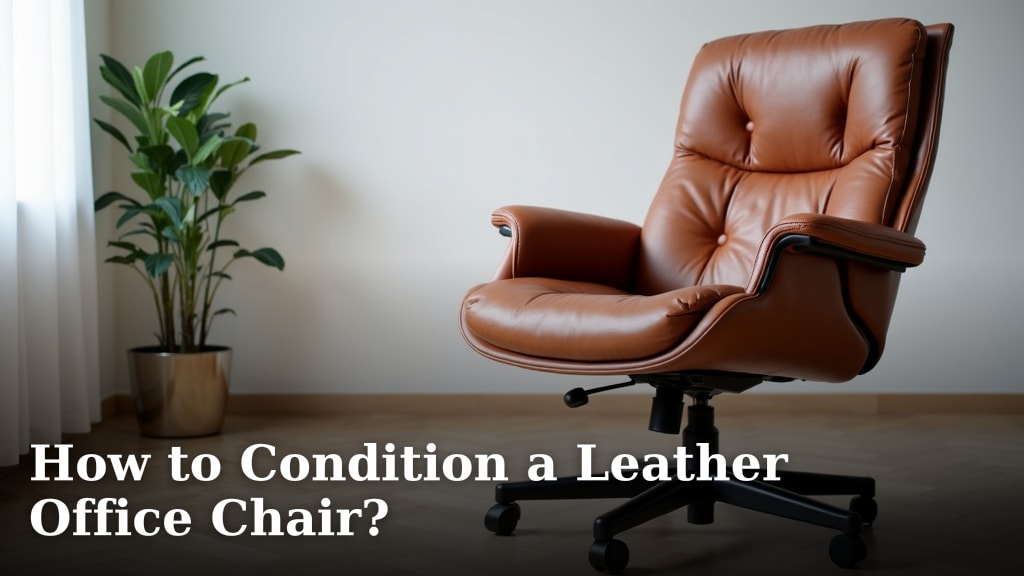
Conditioning your leather office chair is easy and essential for its longevity. You can keep your chair looking great and feeling comfortable by conditioning it regularly. This simple process involves applying a leather conditioner to restore moisture and protect the hide. It’s a straightforward way to maintain that supple feel and prevent cracking.
When leather isn’t conditioned, it can become dry and brittle. This can lead to annoying cracks and a less comfortable sitting experience. Regular conditioning also helps shield your chair from everyday wear and tear. Many experts agree that proper care makes a huge difference in a leather item’s lifespan and appearance.
- Condition your chair every 6-12 months.
- Use a conditioner specifically designed for furniture leather.
- Always test in an inconspicuous spot first.
- Wipe away excess conditioner gently.
- Enjoy your revitalized chair!
Let’s walk through exactly how to condition your leather office chair step by step, ensuring it stays in top shape for years to come.
Keeping Your Leather Office Chair in Prime Condition
Your leather office chair deserves a little pampering. Regular conditioning is the secret sauce to keeping that luxurious leather supple and preventing it from drying out. It’s a simple process that pays off big time. You’ll find your chair feels more comfortable and looks better, too.
Think of it like moisturizing your skin. When skin gets dry, it can crack. Leather is no different! By conditioning, you’re essentially replenishing the natural oils that keep the leather flexible and strong. This prevents those unsightly and uncomfortable cracks from forming. We found that a good conditioning routine can extend the life of your chair considerably.
When Should You Condition Your Leather Chair?
The golden rule is to condition your leather office chair about **every six to twelve months**. However, this isn’t a rigid rule. Several factors can influence how often you need to do it.
Environmental Factors Matter
Does your office get a lot of direct sunlight? Is the air particularly dry? These conditions can speed up the drying process for your leather. If you notice the leather starting to feel a bit stiff or dry, it’s probably time for a conditioning session, even if it’s been less than six months.
We found that chairs placed near windows or in areas with low humidity often need conditioning more frequently. Consider it a **climate check** for your chair. If you live in a desert climate or your office has strong heating systems that dry out the air, plan to condition your chair more often.
Usage Frequency and Type
If your office chair gets a lot of use – perhaps you spend eight hours a day or more in it – it will naturally experience more wear and tear. Daily use means the leather is constantly interacting with your body, clothes, and the environment. This can strip away its natural oils faster.
Think about how often you truly use the chair. Is it your primary workstation, or is it more of a guest chair? A chair that’s used constantly will benefit from more frequent conditioning. We observed that heavily used chairs often show signs of dryness **much sooner** than lightly used ones.
Visual and Tactile Cues
The best indicator is often your own senses. Does the leather look dull or feel dry and rough to the touch? Are you starting to see faint lines or creases that weren’t there before? These are all signs that your chair is thirsty for some conditioner.
You might even hear a slight squeaking sound when you move. That’s often the sound of leather fibers rubbing against each other because they lack lubrication. It’s the chair’s way of saying, “Hey, I need some help!” Don’t ignore these **subtle but important signals**.
Gathering Your Conditioning Supplies
Before you start, make sure you have the right tools. Using the wrong products can actually damage your leather. It’s like using dish soap on your hair – it might clean, but it’s not ideal!
Choosing the Right Leather Conditioner
This is perhaps the **most critical step**. You want a conditioner specifically designed for furniture-grade leather. Not all leather is the same, and a product made for shoes or car seats might not be suitable for your office chair.
Look for conditioners that are water-based or contain natural oils like neatsfoot oil or lanolin. These tend to be gentle and effective. Avoid products with petroleum distillates or silicone, as they can clog the leather’s pores or leave a greasy residue. Many experts recommend conditioners that are specifically formulated for aniline, semi-aniline, or protected leather, depending on your chair’s finish.
Essential Cleaning Supplies
You’ll also need a few other items to get the job done right:
- Soft cloths: Microfiber cloths are ideal because they are gentle and absorbent. Have at least two or three on hand.
- Mild soap or leather cleaner: Before conditioning, it’s important to clean the surface. Use a cleaner specifically made for leather. A pH-neutral soap can also work in a pinch, but always dilute it well.
- Water: For diluting cleaner or wiping away residue.
- Vacuum cleaner with a brush attachment: To remove dust and debris from crevices.
The Step-by-Step Conditioning Process
Now that you have your supplies, let’s get to the actual conditioning. It’s a straightforward process that won’t take up your whole afternoon.
Step 1: Thorough Cleaning is Key
You can’t condition dirty leather. Dust, dirt, and oils from your skin can prevent the conditioner from penetrating properly. This first step is **absolutely essential**.
First, use your vacuum cleaner with the brush attachment to gently remove any loose debris from the entire chair, paying close attention to seams and crevices. Then, dampen a clean microfiber cloth with a little water and wring it out thoroughly. If you’re using a dedicated leather cleaner, follow the product instructions. Usually, you’ll apply a small amount to a cloth, not directly to the leather.
Gently wipe down the entire surface of the chair. Work in sections. Avoid soaking the leather. Once you’ve cleaned it, use another clean, slightly damp cloth to wipe away any cleaner residue. Let the chair air dry completely. This can take an hour or two, depending on humidity.
Step 2: Test in an Inconspicuous Area
Before applying any conditioner to the whole chair, always test it first. This is a **standard practice** in leather care. You wouldn’t paint your entire house without testing a small patch, right?
Find a hidden spot, like the underside of the seat cushion or the back of the chair where it meets the frame. Apply a small amount of conditioner to this area using a clean cloth. Let it sit for about 15-20 minutes. Then, wipe it off and check for any adverse reactions. Look for discoloration, staining, or any other undesirable changes. If everything looks good, you’re ready to proceed.
Step 3: Apply the Conditioner Evenly
Once you’ve passed the test, it’s time to condition the entire chair. Pour a small amount of conditioner onto a clean, soft cloth. You don’t need a lot – less is often more. Over-application can lead to a greasy feel.
Gently rub the conditioner into the leather using circular motions. Work in small sections. Apply a **light, even coat**. Ensure you cover all areas, including the arms, back, and seat. Pay attention to areas that seem particularly dry or worn.
Step 4: Allow for Absorption
After applying the conditioner, let it soak into the leather. This usually takes about 15-30 minutes. During this time, the conditioner’s nourishing ingredients are working their magic, restoring moisture and flexibility to the hide.
We found that giving the conditioner ample time to absorb is key. Resist the urge to immediately buff it off. This waiting period allows the leather to truly drink up the goodness. It’s like letting a good book sink in before discussing it.
Step 5: Buff Away Excess
Once the absorption time is up, take a clean, dry microfiber cloth and gently buff the entire surface of the chair. This removes any excess conditioner that hasn’t been absorbed. It also helps to restore the leather’s natural sheen and leaves it feeling smooth.
A light buffing motion is all that’s needed. You’re not trying to scrub it. The goal is a **smooth, non-greasy finish**. If the chair still feels sticky or greasy, you may have applied too much conditioner, and you might need to buff a bit more or even re-wipe with a slightly damp cloth.
Tips for Maintaining Your Chair Between Conditionings
Conditioning is essential, but a few simple habits can help keep your chair looking and feeling great year-round.
Regular Dusting and Wiping
A quick wipe-down with a dry microfiber cloth every week or so can make a big difference. This removes surface dust and prevents it from accumulating and dulling the leather’s finish. If spills happen, **address them immediately**.
Avoid Harsh Cleaners
As mentioned, stick to cleaners specifically designed for leather. Household cleaners, bleach, or abrasive chemicals can strip the leather of its natural oils and damage the finish. They can cause irreversible fading or cracking.
Protect from Sunlight and Heat
Direct sunlight and excessive heat are leather’s enemies. They can cause fading and drying. If possible, position your chair away from direct sun exposure. Consider using blinds or curtains to filter harsh light. Avoid placing your chair directly next to radiators or heating vents.
Listen to Your Chair
Pay attention to how your chair looks and feels. These are the best guides for determining when it needs attention. A little bit of care goes a long way in preserving your investment and ensuring a comfortable seating experience.
A Quick Conditioning Checklist
To make the process even easier, here’s a handy checklist:
- Gather your supplies: leather conditioner, soft cloths, mild leather cleaner, vacuum.
- Clean the chair thoroughly to remove dust and dirt.
- Test conditioner in an inconspicuous spot first.
- Apply a thin, even layer of conditioner with a cloth.
- Allow conditioner to absorb for 15-30 minutes.
- Buff off any excess with a clean, dry cloth.
Conclusion
You’ve learned how simple it is to condition your leather office chair. By following these steps, you’re not just cleaning; you’re actively preserving your investment. Regular conditioning keeps the leather supple, prevents cracks, and ensures your chair remains a comfortable and stylish part of your workspace for years to come. Don’t wait for signs of dryness to appear. Pick up your supplies today and schedule your next conditioning session to keep your chair in top-notch condition!
Frequently Asked Questions
Can I use any leather conditioner on my office chair?
It’s best to use a conditioner specifically made for furniture-grade leather. Products designed for shoes or car seats might contain ingredients that could harm your office chair’s finish. Always check the label to ensure it’s suitable for your chair’s leather type.
How often should I really condition my leather chair?
We found that conditioning every six to twelve months is a good general guideline. However, you should also pay attention to your chair’s environment and how often you use it. If your office is very dry or sunny, or if you use the chair constantly, you might need to condition it more frequently.
What if my chair looks a little shiny after conditioning?
A little shine is normal as the conditioner restores the natural luster. If it looks overly greasy or sticky, you may have applied too much conditioner. Simply take a clean, dry cloth and buff the area gently to remove any excess product.
Can I skip the cleaning step before conditioning?
No, cleaning is a vital first step. Conditioning dirty leather means you’re essentially rubbing dirt and oils into the hide, which can prevent the conditioner from penetrating properly and may even cause damage over time. Always clean your chair thoroughly first.
Will conditioning fix existing cracks in my leather chair?
Conditioning can help soften the leather and make minor surface lines less noticeable. However, it cannot repair deep cracks that have already formed. Regular conditioning is best used as a preventative measure to avoid such damage in the first place.
