How to Use a Monitor Wall Mount
To use a monitor wall mount, fix the wall plate to a stud, brick, or concrete, attach the arm plate to your monitor's VESA holes, then set height, tilt, swivel, and rotation before you route cables. Check weight, VESA pattern, and wall type first, and tighten every joint before you let go of the screen.
On this page (9 sections)
- How do you check that a monitor fits a wall mount?
- What tools and parts do you need before you start?
- How do you install the wall plate?
- How do you attach the monitor to the arm?
- How do you set height, tilt, and distance?
- How do you use swivel and rotation without straining the arm?
- How do you route cables after the screen is set?
- When should you choose a wall mount over a desk mount?
- How do you check safety and care after set up?
To use a monitor wall mount, fix the wall plate to a stud, brick, or concrete, attach the arm plate to your monitor's VESA holes, then set height, tilt, swivel, and rotation before you route cables. That order keeps the screen stable while you work.
This guide shows how to check fit, install the plate, attach the screen, and adjust for comfort. We compared mounts by reach, tilt range, VESA support, and weight limit.
How do you check that a monitor fits a wall mount?
Check screen size, weight, and VESA pattern before you touch the wall. Those three numbers decide which mounts are safe.
For a heavy screen on a desk, compare heavy-duty monitor arms and check their weight limits.
Measure the screen diagonal and look up the monitor weight. If you have an ultrawide, compare monitor arms for ultrawide screens against its size and weight.
Find the VESA pattern on the back, such as 75x75mm or 100x100mm.
Do not guess from box size. Weight and VESA matter more than size alone.
If a number sits close to the limit, choose a mount with more headroom.
Wall type matters as much as the screen. Wood studs, brick, and solid concrete can hold a plate with the right hardware.
Drywall alone cannot hold the load.
The WALI mount fits 13 to 32 inches and up to 33 lb, with VESA 75x75mm to 100x100mm. That makes it a clear pick for a wide size range and a high weight limit.
What tools and parts do you need before you start?
Lay out the wall plate, arm, VESA plate, screws, and manual before you drill. A clear bench helps you spot missing hardware early.
You will usually need a stud finder, drill, level, tape measure, pencil, and a screwdriver that fits the kit. Keep wall screws separate from VESA screws, since lengths differ.
Read the manual first. It shows which screws go into the wall, which go into the monitor, and how the arm locks to the plate.
Test the arm on the floor before you lift the monitor. Extend it, fold it back, and find the lock points.
That practice run shows how much force the joints need.
If you compare wall mounts with desk options, start with computer monitor arms to see how arm style changes reach and cable routing.
How do you install the wall plate?
Mount the wall plate level, into solid support, at the height where the screen will sit. Height first, then arm, then screen.
Mark the stud or brick position with a pencil. Hold the plate against the wall, check it with a level, and mark the top screw holes.
Fix the plate with screws and anchors that match your wall. Wood studs need stud screws, and solid concrete needs the anchors in the kit.
Tighten screws in a cross pattern.
Pull the plate gently once fixed. It should not wobble.
If it moves, stop and fix the wall fixing before you attach the arm.
For wider plate styles, see the [best monitor wall mount](/best-monitor-wall mount/) guide.
How do you attach the monitor to the arm?
Attach the VESA plate to the monitor first, then lock that plate to the arm. Keep one hand on the screen until the lock is fully engaged.
Line the plate with the four holes on the back of the monitor. Insert the correct VESA screws and tighten them evenly in a cross pattern.
Lift the monitor with the plate already on it, or follow your manual for a slide in method. Keep the screen close to your body.
Lock the plate to the arm and check the connector from two sides. Tug the plate lightly while you support the screen.
If it slides, the lock is not set.
The Pipishell mount covers 13 to 43 inch flat and curved screens up to 44 lb, with VESA from 75x75mm to 200x200mm. That wider range helps if your screen uses 200x200mm holes.
How do you set height, tilt, and distance?
Set height before tilt, and set sight lines before you lock the joints. Small moves now save you from redoing the setup.
Sit with feet flat and eyes level. Hold the screen at the height you want, or use the height control if your mount has one.
The top should sit at or just below eye level.
Pull the arm out to the distance that feels right, then push it back a little. You want to read without leaning, about an arm's length, then fine tune by a few inches.
Tilt the top edge back slightly. That angle reduces glare from a window or ceiling light.
Judge it from your normal sitting posture.
The MOUNT PRO arm extends to 21.6 inches and retracts to 3.9 inches, with tilt from +90° to -45°. That long reach helps when the wall sits behind a deep desk.
How do you use swivel and rotation without straining the arm?
Use swivel to face the screen toward your chair, and use rotation only after swivel is set. Swivel turns the screen left or right, while rotation spins it between landscape and portrait.
Sit down and turn the screen until it faces you squarely. If you share the desk, set swivel for the person who uses the screen most.
For portrait mode, rotate 90 degrees, then check that edges clear the wall and desk. Some screens sit wider in portrait and can clip a corner when folded.
Move the arm with two hands, one near the screen and one on the arm. Lock each joint after you move it.
If you mostly need portrait for documents or code, compare a best vertical monitor wall mount for arms tuned for that rotation.
How do you route cables after the screen is set?
Route cables last, after height, tilt, and swivel are locked. Cables pull on the screen, so a cable fitted too early can drag it out of position.
Run power and video cables along the arm with the clips or channels on the arm. Leave a gentle loop at each joint so the arm can still move.
Keep the loop loose enough for full motion, but not so loose that it hangs against the wall.
Plug in the monitor and test the image before you close any cover. Move the arm through its full range once more.
If a cable snags, add slack at that joint.
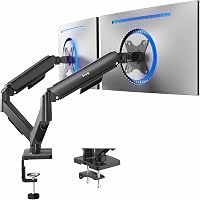
For two screens, a [best dual monitor wall mount](/best-dual-monitor-wall mount/) can keep both arms aligned. For a very wide screen, a best wall mount for ultrawide monitor may suit better.
When should you choose a wall mount over a desk mount?
Choose a wall mount when you need desk space and the wall sits in the right place. Choose a desk mount when you rent, move furniture often, or lack a solid wall.
A wall mount clears the desk for a keyboard, papers, or a laptop. It also keeps the screen steady when you type, since desk vibration does not travel through the arm.
A desk mount wins on flexibility. You can move it to another desk and avoid drilling.
A freestanding monitor stand is another no-drill choice when you do not need an adjustable arm.
If your wall has no stud where you need the screen, a desk arm may give a better angle.
Your chair matters too. If the wall pushes the screen too far away, a Best Desk Chair for Multiple Monitors can help.
For longer workdays, an Best Ergonomic Chair for Multiple Monitors may suit you.
Compare both paths in our best monitor desk mount guide. The right choice depends on wall access, desk depth, and how often you move the setup.
How do you check safety and care after set up?
Check every screw and joint after the first week, then once a season. A loose screw can turn a small wobble into a drop.
Tighten wall plate screws, VESA screws, and arm locks with the screen supported. Look for paint cracks around the plate or screws that spin without biting.
Stop using the mount if you see those signs.
Wipe the arm and plate with a dry or slightly damp cloth. Do not spray cleaner onto joints.
Test full range of motion after any change. Extend, fold back, tilt, and rotate.
The arm should move in a controlled way and lock without a jolt.
End by sitting for a full work session. If you lean or twist to see the screen, move the chair, desk, or mount by a small amount.
Frequently asked questions
How do I attach a monitor to a wall mount?
Match your monitor's VESA holes to the arm plate, usually 75x75mm or 100x100mm, then secure the plate with the correct screws. Hold the screen while you lock the plate to the arm and tighten it evenly.
Always check the monitor weight against the mount limit before you start.
How high should a wall mounted monitor be?
Set the top of the screen at or just below eye level when you sit, with the center about 20 to 30 inches from your eyes. Adjust height first, then tilt the top of the screen slightly back so the view is straight on.
Move your chair or desk if the wall position forces a poor angle.
What wall can a monitor wall mount go on?
Most mounts in this guide suit wood studs, brick, or solid concrete, and drywall alone is not enough. Find a stud or use anchors made for the wall material, and follow the hardware kit for that wall type.
If you cannot reach a stud, move the mount or choose a different support.
How do I adjust tilt, swivel, and rotation on a wall mount?
Tilt moves the top of the screen forward or back to cut glare, swivel turns the screen left or right, and rotation turns it between landscape and portrait. Loosen only the joint you need, move the screen with two hands, then lock it again.
Start with tilt, then swivel, then rotation, and check the view from your chair.